Wednesday, July 24, 2013

Life Lately

DPP_0274

Big things are happening over here! I'm making some major life changes, so it'll be a little quiet around the blog here.  I'll probably still pop in with a few posts here and there as I finish up random projects (and believe me, I have a ton of crochet projects on the docket).  Things probably won't be back to normal until at least October, so please stick around?  I promise this is not a permanent hiatus!

Friday, July 19, 2013

Our late spring/early summer garden

Warning, this post is very picture heavy!

We are having pretty decent success with our container garden this year.  We have quite a variety of things: cherry and heirloom Mr. Stripey tomatoes, snow peas, marjoram, rosemary, thyme, parsley (or is it cilantro?), bell peppers, Japanese eggplants, cucumbers, Serrano peppers, Anaheim peppers, sweet peas, and beets.

DPP_0269

DPP_0266DPP_0270
These are Scented Streamer sweet peas that we bought a packet of seeds of at the Flower Fields in Carlsbad last year.  They smell amazing!  They were definitely late bloomers, these are the first flowers since they were planted in like February in our big trough.  All of the seeds sprouted but only one or two of them actually grew :(  I'm hoping things are looking up now!

DPP_0268

DPP_0271

DPP_0267
I think these Japanese eggplants are so neat! They have spikes in the middle of the leaves, how weird is that? Plus, these things are pretty much a miracle since we tried to grow black beauty eggplants last year and those always blossomed but never fruited. 

DPP_0272
And these are our awesome handmade wooden troughs! Sweet peas in the left and beets on the right.  Each trough is made out of one long board that was cut into four pieces, it's about 4 feet long so it holds a ton of dirt.  We just screwed the boards onto the sides using long wood screws and at the same time learned the importance of drilling pilot holes :)

Thursday, July 11, 2013

Multi-Stranded Hair Elastics [A Photo Tutorial]

So I decided to expand on my little explanation tutorial from previously (my refashioned hair ties) with a few more pictures.  I'm still rocking the colorful elastics everyday, and they've been holding up pretty well.  If crazy 2/3/4 color hair ties aren't your thing, you can certainly make one with all black elastics, I have.  And I know a lot of girls actually like to hide their hair ties under a small wrapped bunch of hair, but try these out for exercising.. or something! I bike to work everyday, so a not-too-fussy ponytail is critical.

Let's dive in!

DPP_0257
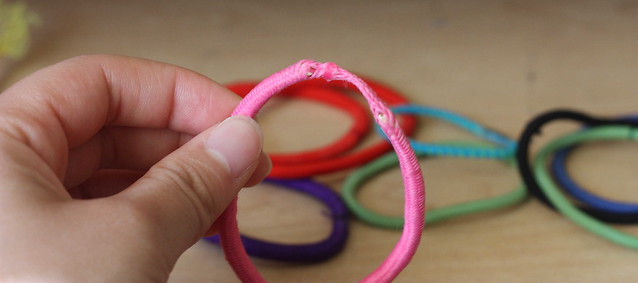
If you have a lot of hair elastics that look like this, these are the perfect candidates for turning into multi-stranded hair ties.

DPP_0258
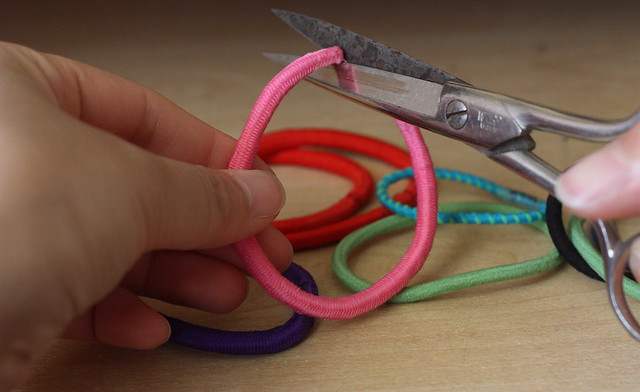
1. Cut off the stretched out portion between the ends of the elastic. (I love my new/old scissors! I got them at an estate sale lately for basically nothing, and they're still sharp!)

DPP_0259
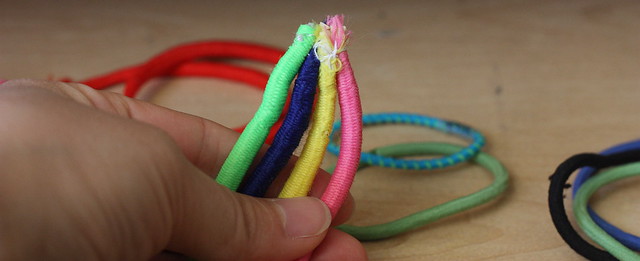
2. Align the ends of all your hair ties and put them in a pretty color order!

DPP_0260
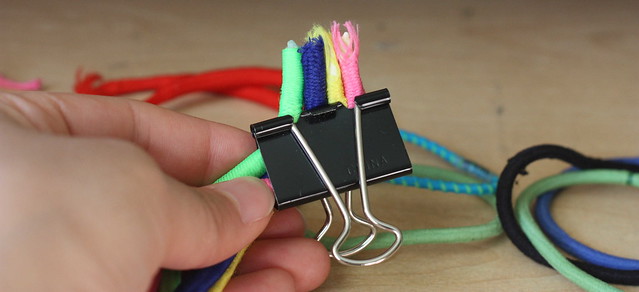
3. Use a binder clip to secure the ends of the elastics as arranged about half and inch from the ends as shown.  Make sure that they are all very close together.

DPP_0261
4. Sew all the ends together with a hand needle and some thread, any color is fine really.  Just go back and forth several times and in all random directions, just make sure it's secure.  I sewed through the elastic as well as the colored casing so that the elastic couldn't pull away and become stretched out again so easily.

DPP_0262
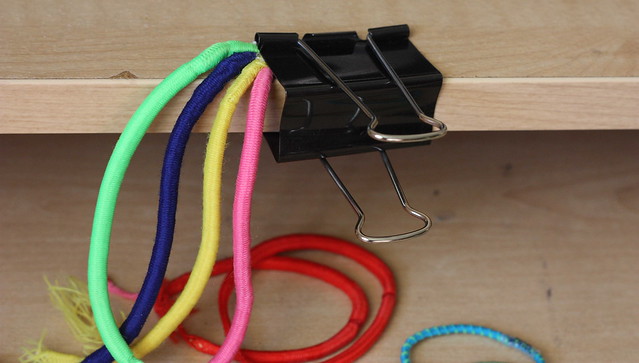
5. Secure your sewn end to a table/desk.  I used a large binder clip and then put just the very end of the elastics under the clip, just to hold in place while you braid.
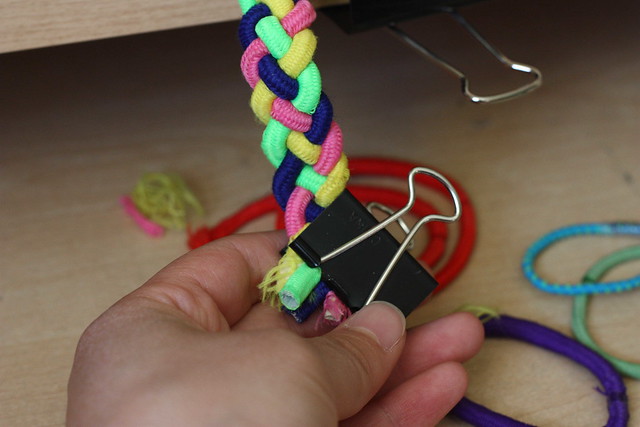
DPP_0263
6. Braid! I used this fabulous tutorial for the four-stranded braid from Rock Mosaic.  You can, of course, do a regular three-stranded braid or a two-stranded twist.  Make sure it's a tight braid and go all the way to the very end of the elastics as much as possible.  Secure the end of your braid with a second binder clip and sew those ends together as well.

DPP_0264
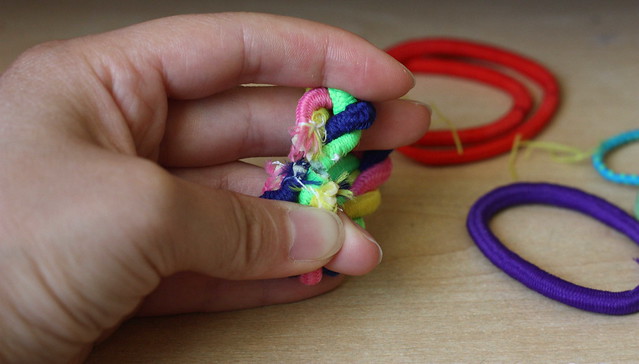
7. With both ends sewn up, join the two ends together (be careful not to twist!) as shown and sew the two ends to each other.

DPP_0265
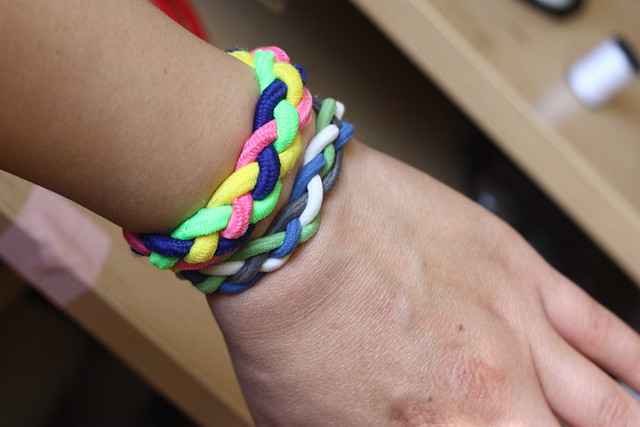
8. All done!  The braided elastic is much tenser than any single elastic alone.  Plus, your new colorful hair tie also doubles as a pretty bracelet when you're not wearing your hair up!

If you make one, post a picture, I'd love to see!  I like the idea that there are other people out there with fun hair elastics too :)

Sunday, July 7, 2013

I have a big head...and little arms...

Ok, I have quite a lot of notes/adjustments on this pattern by Elizabeth Mareno

I did use a chunky yarn instead of worsted, and I ended up using somewhat more than 1 skein of Lion Brand Hometown.

Head: Made as written in pattern (ignore the stitch counts in parentheses because they apparently are a little wonky/not quite right)

Eyebrows/Eyes/Teeth: Not made. Could not understand, for the life of me, what the eyebrow directions meant.  I prefer a pretty safety eye anyway.  No teeth embroidery either as it creeped me out a little.

Neck and Body: All rounds made as usual except multiple rounds of SC around were omitted.  Meaning that, where noted, I made one row of single crochets but then did not make the next one or two rounds of single crochet (ex: R10-12, I only made R10 and then skipped to R13).

Front Arms: Not made as written.  I ended up with teeny little sticks for arms because I liked it better.
Round 1: Ch 2, 3 SC in 2nd ch from hook
Round 2-4: SC around.
F/O (Make 2)

Back Legs: Made 2 of the Left Leg pattern but fastened off after round 7 (did not work 8 or 9).  Sewed on both legs using same technique as my hippo - more underneath the body than sticking out from the sides.

DPP_0255

DPP_0256

He's very front heavy and can't stand up on his own :(  But this is what I think of, haha!


And this!


Ok, ok, enough of the tiny arm jokes.  At least he ended up cute in the end!

Monday, July 1, 2013

Guess what? Pork Butt!

This is a wonderful recipe for a Miso Pork Stew by Ming Tsai via Food Gal!  I love it, it's so delicious and flavorful.  It does take a long time to make, but it's totally worth it.  We like to start it after lunchtime on the weekend and then it's ready for dinner. 

I find that it's really easy to broil your peppers in the toaster oven if you cut them up into four parts, then the skin will be blistered enough to peel off.  Plus, buy the pre-shelled edamame beans, then you can just dump them into your pot, isn't convenience food nice?

This definitely makes enough for a giant pot of leftovers.  I recommend that after refrigerating over night that you skim the fat off the top.  I'll give you a hint, it's the thick orange squishy looking layer on top and even though it looks like it might be sweet potato, definitely skim that off as much as you can.

DPP_0253

DPP_0254